
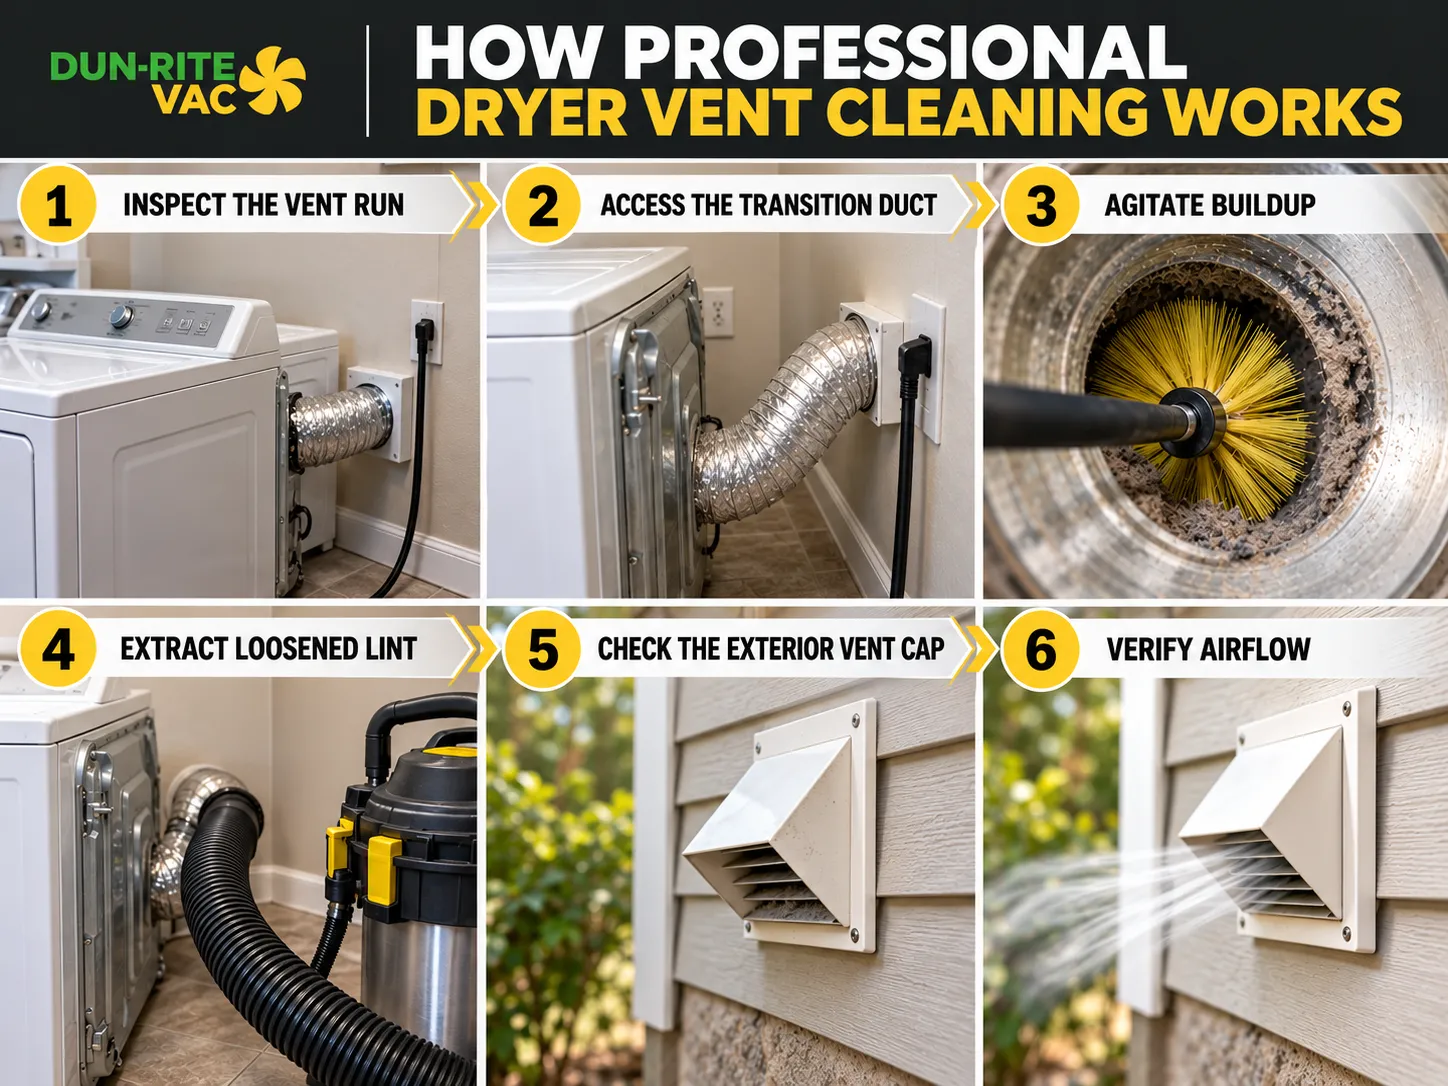
The dryer vent cleaning process involves more than running a brush through the duct. A professional cleaning includes inspecting the vent layout, accessing the transition duct, loosening and extracting buildup, checking the exterior termination, and verifying airflow before the dryer is reconnected.
Dun-Rite Vac is a third-generation, family-run company that has been cleaning ducts and vents across Saskatchewan and Western Manitoba since 1998. We’re a NADCA member with ASCS-certified technicians, and the steps below describe what a thorough professional dryer vent cleaning involves, including where the routine bends depending on how your vent is laid out.
Quick Answer: The dryer vent cleaning process starts with checking the vent run, then disconnecting the dryer so the whole duct is reachable. The technician agitates the lint loose, extracts it, checks the exterior vent cap, and confirms airflow before reconnecting. Vent length, bends and exit point change the tools and time needed, not the sequence.
In this article
- The Dryer Vent Cleaning Process Starts Before Any Tool Comes Out
- Why the Dryer Has to Come Away From the Wall
- Loosening Lint Is Only Half the Job
- Why a Freshly Cleaned Duct Can Still Fail at the Wall Cap
- How a Technician Knows the Run Is Actually Clear
- Short Runs, Long Runs and Roof Exits: How the Job Changes
- Frequently Asked Questions
The Dryer Vent Cleaning Process Starts Before Any Tool Comes Out
Before anything gets moved, the technician needs to know what kind of system they’re dealing with. That means tracing where the vent leaves the dryer, how far it runs, how many turns it takes, what it’s made of, and where it exits the building.
This look-over is part of the cleaning visit rather than a separate appointment, and it decides which tools and approach make sense. A short, straight run behind a main-floor laundry closet is a very different job from a long run that winds through a basement ceiling.
It’s also the moment to note anything that will affect the result: crushed sections, loose joints, or a vent that clearly doesn’t match the dryer it serves. If something needs repair rather than cleaning, a good technician flags it up front, not after the job.
Why the Dryer Has to Come Away From the Wall
A common shortcut is to clean only from the outside, pushing a brush in through the exterior cap. It feels efficient, but it can leave an important stretch untouched: the connection right behind the machine, where the duct changes direction and the configuration can restrict airflow or collect lint.
One condition technicians can run into when a dryer comes away from the wall is a flexible transition duct that has been crushed or kinked behind the machine. The U.S. Department of Energy’s guidance on proper clothes dryer venting specifically calls for checking the transition duct for crushing, kinking, or clogging after the dryer is detached. Disconnecting the dryer gives the technician direct access to inspect that section properly.
Disconnecting also makes it possible to clear the dryer’s own exhaust outlet and the area behind and beneath the machine, where loose lint tends to collect. That way the whole path from drum to outdoors gets attention, not just the middle of it.
Loosening Lint Is Only Half the Job
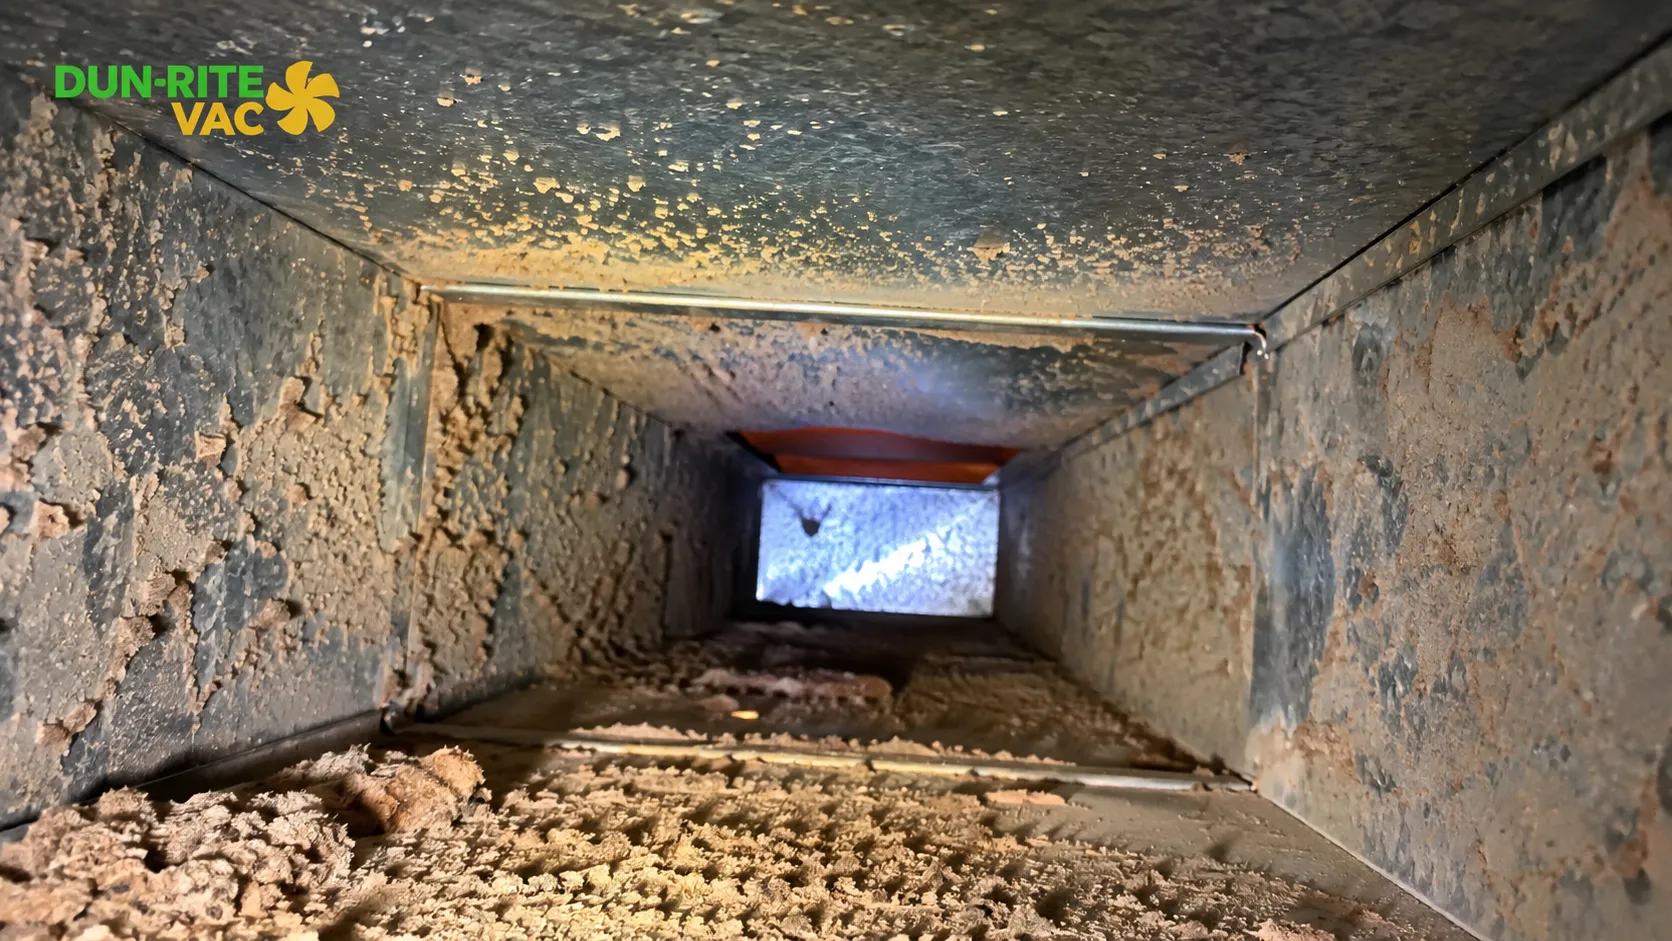
Lint can accumulate along the dryer exhaust duct rather than remaining in one easy-to-reach location. A thorough cleaning therefore needs to loosen buildup and remove the loosened material from the vent rather than simply shifting it farther along the run.
Agitation breaks buildup away from the duct walls using tools suited to the vent layout, while extraction removes the loosened material from the system. Professional dryer-vent equipment can combine mechanical brushing with vacuum extraction; for example, NIKRO’s professional dryer vent cleaning system pairs a rotary brush system with a HEPA-filtered vacuum designed for dryer vent cleaning.
Agitation without extraction only redistributes lint, often into the bends and the exterior cap, where it can restrict the vent all over again.
Why a Freshly Cleaned Duct Can Still Fail at the Wall Cap
A situation our technicians can run into is a vent that looks fine from the outside while the flap or bird guard is quietly clogged with lint, or stuck partway shut. When that happens, warm, moist air can’t leave freely, and the duct behind it can load up again no matter how clean it was.
So the exterior check is a real step, not an afterthought. The technician looks at the cap or hood, confirms the damper opens and closes as it should, and clears anything obstructing it, whether that’s lint, debris or a nest.
In a Saskatchewan winter it’s worth checking that nothing is preventing the damper from moving freely. That’s one more reason a proper job doesn’t stop at the inside of the wall.
Not sure whether your vent has ever been cleaned end to end, cap included? Send us a note and we’ll walk you through what a visit would cover for your setup.
How a Technician Knows the Run Is Actually Clear
Clean-looking duct at the ends doesn’t necessarily tell you how the entire run is performing. Once the lint is out, airflow can be checked to confirm that air is moving through the dryer exhaust system. The NADCA Dryer Exhaust Duct Performance Standard describes performance testing after a duct has been visually inspected and confirmed clean, including measurements of airflow velocity and static pressure.
If airflow still feels weak, that’s information: a crushed section, a disconnected joint or a duct that’s too long or too twisty for the dryer. Better to find that while the technician is still on site than to discover it on the next wet load.
Once the run checks out, the dryer is repositioned and reconnected. You should be able to run it and see for yourself that the exhaust is moving outside.
Short Runs, Long Runs and Roof Exits: How the Job Changes
The sequence stays the same, but the vent layout changes how much effort each step takes.
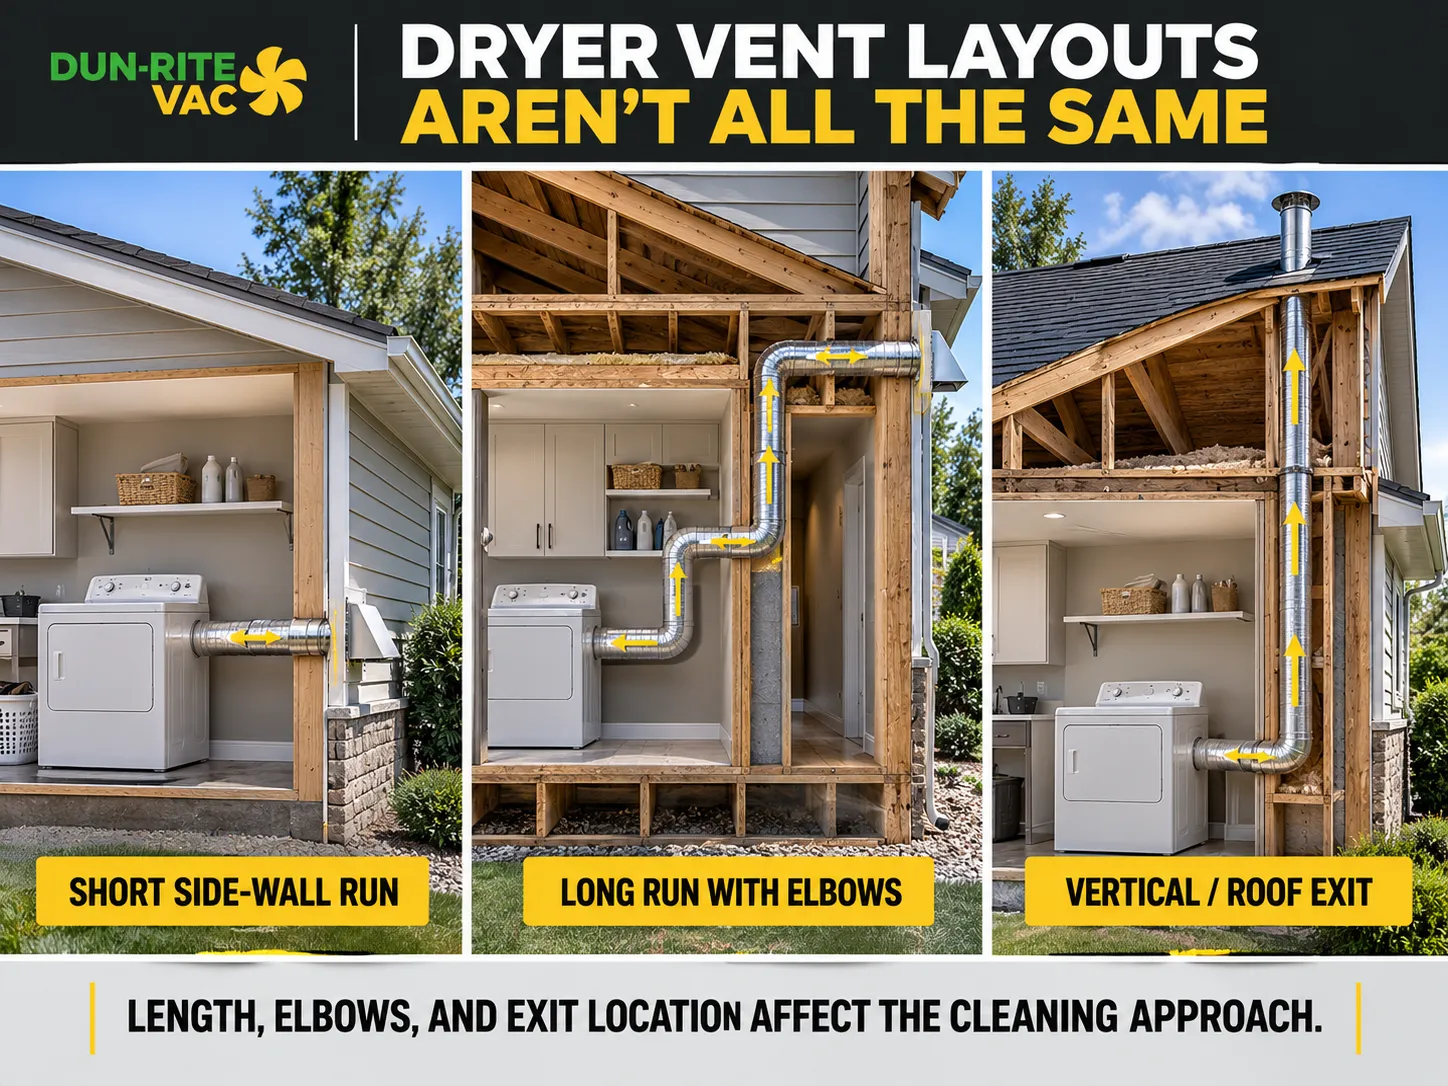
- Short, straight runs through a nearby exterior wall are usually the simplest. Agitation and extraction can reach the whole length with little difficulty.
- Long runs with several elbows require the technician to account for more developed duct length and a more complex route. The NADCA Dryer Exhaust Duct Performance Standard specifically accounts for total duct length and the number and type of elbows when documenting a dryer exhaust system.
- Vertical or roof exits work against gravity, so lint doesn’t drift out easily and the exit cap needs checking in a different way than a side-wall cap does.
- Multi-unit and commercial setups may have several dryers or shared exhaust runs, which means more lines to clear and verify before the job is complete.
The exact dryer vent cleaning process can vary with the layout of the system. If you’d like the bigger picture on what’s covered, our dryer vent cleaning service page lays it out, and the same team also handles the home’s furnace duct system if that’s on your list. With more than 50,000 completed jobs behind us, we’ve worked with a wide range of layouts.
Frequently Asked Questions
Will you need to move my dryer and washer to do the cleaning?
Your dryer has to be moved and disconnected for a proper cleaning, since that’s how the technician reaches the transition duct behind it. It’s helpful to have a clear path to the laundry area, but the crew handles the moving and reconnecting.
How long does a typical visit take, and does vent length matter?
Length, bends and exit point all matter more than the size of your home. A short run to an exterior wall goes faster than a long run with several turns or a roof exit, so the technician can give you a more reliable sense of time once they’ve seen the layout.
What’s the difference between cleaning from the inside and cleaning from the outside only?
Outside-only cleaning can miss the section behind the dryer and the bends within the wall, where lint gathers. Working from both ends lets the technician clear the entire run and confirm the exterior cap opens properly.
Is a vent that exits through the roof cleaned the same way as one through a side wall?
The steps are the same, but a vertical run works against gravity, so extraction matters even more and the roof cap needs its own check. The technician will size up the layout before deciding on tools and approach.
Curious what your own vent would need? We’ll take a look, explain what we find, and stand behind the work with our 100% Satisfaction Guarantee.